Quick Facts
- Yield: 8 individual galettes
- Prep Time: 45 minutes + 2 hours chilling
- Bake Temperature: 375°F (190°C)
- Key Benefit: Superior crust-to-filling ratio for a crunchier texture
- Trend Insight: 18% projected growth in "perfect portion" treats for 2025
- Storage: Dough lasts 1 week in the fridge; unbaked galettes last 3 months in the freezer
To make mini strawberry galettes from scratch, roll out disks of flaky pie dough and cut them into quarters. Fill the center of each piece with a mixture of quartered strawberries, sugar, cornstarch, and lemon juice. Fold the edges inward to create a rustic border, brush with an egg wash for a golden finish, and bake at 375°F until the crust is deeply browned and the fruit is bubbling.
Individual strawberry galettes are the ultimate summer treat. Unlike a full-sized pie, these mini strawberry galettes offer a superior crust-to-filling ratio and a shatteringly crisp texture. Inspired by the Alison Roman strawberry galette method, this guide shows you how to make individual strawberry galettes from scratch for your next picnic or dinner party. This pivot toward smaller bakes is more than a whim; according to a global consumer survey, 65% of individuals prefer smaller dessert portions as a way to indulge without compromising on health or taste.
The Secret to a Shatteringly Crisp Crust
The foundation of a great rustic summer tart is the dough. To achieve that iconic shatteringly crisp texture, we have to move away from the food processor. While a machine is fast, it often pulverizes the fat too finely, leading to a mealy crust rather than a flaky one. Instead, we embrace manual dough mixing.
Start with very cold unsalted butter. Instead of cubing it into tiny pieces, use your fingers or a pastry cutter to smash the butter into the flour and salt. You are looking for long, flat flakes of butter—think of them as large shards. When these shards hit the heat of the oven, the water in the butter evaporates, pushing the flour layers apart and creating that desirable lift.
The liquid element is equally important. We use a combination of ice water and a splash of apple cider vinegar. The acid in the vinegar is a secret weapon; it helps inhibit gluten development, ensuring the crust remains tender rather than tough. Add the liquid a tablespoon at a time until the mixture just barely holds together. You are looking for a shaggy dough consistency. It should look a bit dry and messy, not smooth or shiny. This "shaggy" state is the hallmark of a flaky homemade pie crust.
Editor's Tip: If your dough looks like it’s coming together perfectly into a smooth ball before it hits the fridge, you’ve probably added too much water or over-worked it. Aim for the "perfectly imperfect" craggy mass.
Troubleshooting Flaky Pie Crust for Mini Galettes
If you find your dough is cracking excessively when you roll it out, it might be too cold or too dry. Let it sit on the counter for five minutes to take the chill off. If it’s still unmanageable, you can lightly spritz it with water. Remember, Alison Roman mini strawberry galette recipe tips always emphasize that the dough is forgiving. A few cracks add to the rustic charm.
Perfecting the Filling: Even with Subpar Fruit
We all dream of those deep red, juice-heavy strawberries found at peak summer farmers' markets. However, the reality of making an individual dessert for entertaining is that sometimes we have to work with grocery store berries that are a bit white in the center.
The beauty of baking strawberries is that the oven acts as a concentrator. By roasting the berries with sugar and a bit of acid, you create a concentrated fruit flavor that masks any lack of ripeness. For eight individual galettes, you will need about 1.5 pounds of fruit.
When it comes to thickeners, you have options. Most Alison Roman strawberry galette adaptations suggest cornstarch for its reliability and availability. However, if you want a clearer, more professional-looking glaze, you might consider tapioca starch.
| Feature | Cornstarch | Tapioca Starch |
|---|---|---|
| Finish | Opaque, matte look | Glossy, clear finish |
| Stability | Best for room temp | Holds up well when frozen/reheated |
| Texture | Thicker, jam-like | Slightly more fluid/syrupy |
| Best For | Daily home baking | Professional presentation |
Regardless of the thickener, always add a squeeze of lemon juice. It brightens the fruit and balances the sugar. If your berries are particularly bland, a tiny pinch of black pepper or a dash of balsamic vinegar can work wonders to deepen the flavor profile.
Assembly: Shaping the Perfect Handheld Pastry
Once your dough has chilled for at least two hours, it is time to assemble these handheld pastries. You have two choices for portioning. You can roll the dough into 7-inch individual circles, or roll out large 14-inch disks and cut them into quarters to create triangles. The triangular shape is particularly efficient and results in less wasted dough.
When filling, leave at least a 2-inch border around the edges. This is crucial. If you overstuff the center, the juices will escape and turn your baking parchment into a sticky mess. Place the fruit in a neat pile, then begin the rustic fold. Simply lift the edges of the dough and pleat them over the fruit, pressing gently to seal.
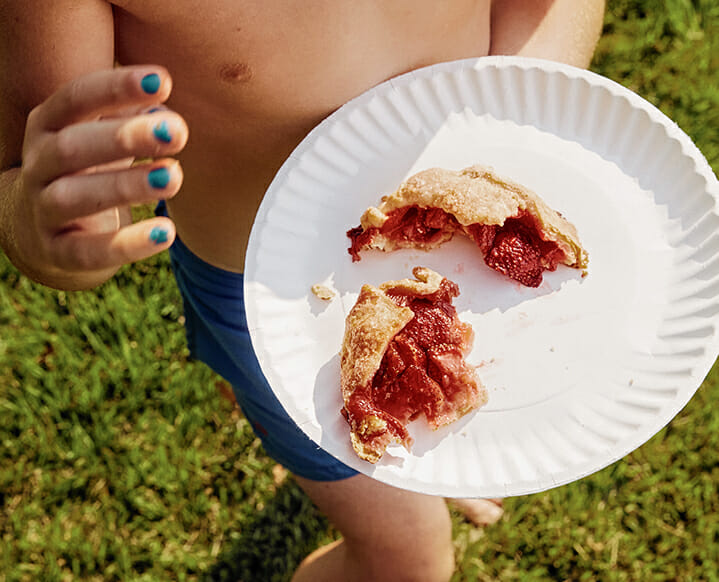
Before these go into the oven, they need a finishing touch. An egg wash glaze—simply a beaten egg with a teaspoon of water—is the difference between a pale, sad crust and a vibrant, golden-brown finish. Brush it generously over the dough (avoiding the fruit) and sprinkle with coarse sugar. This adds a delightful crunch that contrasts with the soft fruit.
Baking and Sensory Benchmarks
Baking is where the magic happens, but you shouldn't just rely on the timer. Different ovens and the water content of your berries will change the bake time. Set your oven to 375°F and aim for 30 to 40 minutes.
To ensure success, look for these sensory success benchmarks:
- The Look: The crust should be a deep, dark gold, bordering on brown. The strawberry juices should be thick and bubbling in the center, looking like molten jam.
- The Sound: Give the edge of the crust a light tap with a fingernail or a spoon. You should hear a hollow tap. If it sounds soft or thuddy, it needs more time.
- The Feel: The galette should feel light and rigid when lifted with a spatula. If it bends or feels heavy, the bottom is likely still underbaked.
The most difficult part of this recipe is the cooling process. You must wait at least 20 minutes before eating. This allows the cornstarch or tapioca to set, turning the runny juices into a cohesive sauce. If you cut in too early, the filling will run right off the pastry.
Prep-Ahead, Storage, and Entertaining
As we move into 2025, the demand for "portion-controlled" yet indulgent treats is soaring. The market for these "perfect portion" bakes is projected to grow by 18% in the English-speaking world. This makes mini strawberry galettes a brilliant choice for modern hosting.
One of the best things about this recipe is how well it fits into a busy schedule. You can make the dough up to a week in advance and keep it in the fridge. For even longer-term prep ahead individual desserts for summer entertaining, you can assemble the galettes fully and freeze them raw. Unbaked individual galettes can be stored in the freezer for up to three months and baked directly from frozen—just add five to ten minutes to the baking time.
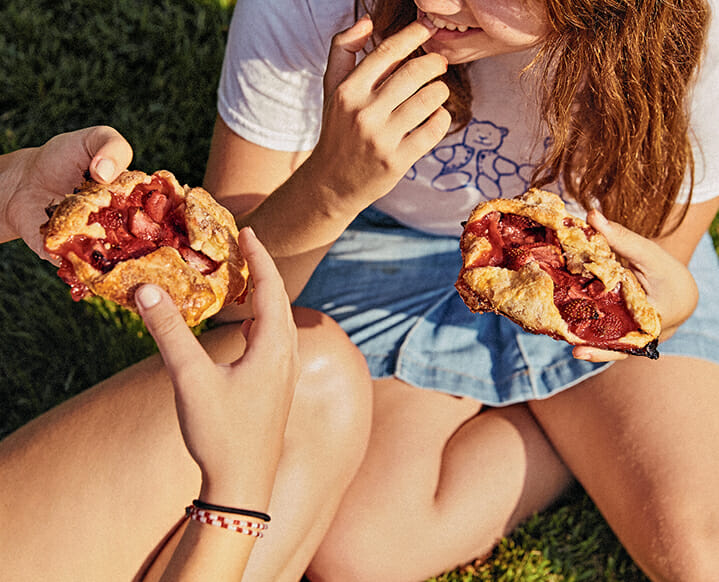
For a picnic-friendly dessert, these galettes are unmatched. Once cooled, they are sturdy enough to be wrapped in parchment paper and stacked in a basket. They don't require forks or plates, making them the ultimate "handheld" luxury. If you are serving them at home, a scoop of vanilla bean ice cream or a dollop of unsweetened whipped cream provides the perfect creamy foil to the acidic fruit and salty crust.
When storing and transporting mini strawberry galettes that have already been baked, keep them at room temperature for up to two days. Wrap them tightly in foil or store in an airtight container. If they lose their crispness, a five-minute stint in a 350°F oven will revive that shatteringly crisp texture instantly.
FAQ
What is the difference between a mini galette and a mini pie?
A mini galette is free-form and baked on a flat baking sheet, whereas a mini pie is baked in a tin or mold. Galettes are known for their rustic summer tart appearance and a higher ratio of crust to filling because they aren't contained by high walls, allowing the dough to crisp up more evenly on all sides.
How do you prevent mini strawberry galettes from getting soggy?
To prevent a soggy bottom, ensure your oven is fully preheated to 375°F before the galettes go in. Additionally, using a thickener like cornstarch helps absorb the strawberry juices. For the best results, bake the galettes on the bottom rack of the oven for the first 15 minutes to set the bottom crust before moving them to the middle rack to finish browning.
Can I use frozen strawberries for mini galettes?
Yes, you can use frozen strawberries, but do not thaw them first. Thawing causes the berries to release too much moisture all at once, which can lead to a soggy crust. Toss the frozen berries directly with the sugar and cornstarch and bake immediately. You may need to add 5-8 minutes to the total baking time.
How do you fold a mini galette so it doesn't leak?
The trick to a leak-proof galette is the 2-inch border and tight pleating. When you fold the dough over the fruit, make sure each pleat overlaps the previous one significantly. Press down firmly on the folds to "lock" them in place. If a little juice leaks out, don't worry—in the world of Alison Roman strawberry galette baking, a little messy juice is considered a sign of a well-filled, rustic pastry.
Can I make the galette dough in advance?
Absolutely. The dough for your flaky homemade pie crust can be made and stored in the refrigerator for up to one week. For longer storage, wrap the dough disks tightly in plastic wrap and then aluminum foil, and freeze them for up to two months. Thaw the dough in the refrigerator overnight before rolling it out for your mini strawberry galettes.